Brass & Bronze Valves

PURCHASE FROM OUR STORE

Legend Valve 3/8

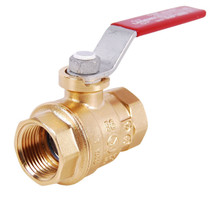
Legend Valve 3/8" Brass Full Port Ball Valve (FPTx FPT)

  • SKU: BRV03NL
  • Brand:

  • Product Description:

    Designed for residential and commercial use on steam, water, oil or gas.

    • T-1001NL Series
    • Durable forged brass body
    • Bottom-loaded blowout-proof stem
    • Maintenance free dual O-ring stem seal
    • Improved Dyneon* TFM PTFE seats
    • Female Pipe Threads x Female Pipe Threads
    • Both ends fit over male pipe threads
    • Lead Free
    • Available in 1/8" - 4" sizes

    Working Pressure, Non Shock (PSI)

    Cold working pressure (CWP): 1/8"- 2" 600 p.s.i. 2-1/2"- 4" 400 p.s.i.

    Saturated steam (WSP): All sizes: 150 p.s.i.

    Conforms to MSS SP-110

    • End connections comply with: ANSI / ASME B1.20.1 (FNPT) ANSI / ASME B16.18 (CTS Sweat)

    • Manufactured in an ISO accredited facility.

    • CSA Certified for use with natural, manufactured, mixed, liquid petroleum and LP gas/air mixtures:

    • ANSI Standard Z21.15 for use as a gas appliance connector valve for 1/2 lb. systems (1/2"-3")

    • CSA Certified 3-88 for use in 2 or 5 lb house piping systems (1/4"& 1/2"-2")

    • ANSI / ASME B16.33 for use in gas piping systems up to 125 psig (1/2"-1")

    • UL listed 44R8 for LP, natural and manufactured gases; flammable liquids, #6 oil at 250°F (1/4"- 2").

    • UL listed 757X for fire protection service (1/2"- 2").

    • Factory mutual approved for fire protection service (1/2"- 2").


Legend Valve 4

Legend Valve 4" Brass Full Port Ball Valve (FPTx FPT)

  • SKU: BRV40NL
  • Brand:

  • Product Description:

    Designed for residential and commercial use on steam, water, oil or gas.

    • T-1001NL Series
    • Durable forged brass body
    • Bottom-loaded blowout-proof stem
    • Maintenance free dual O-ring stem seal
    • Improved Dyneon* TFM PTFE seats
    • Female Pipe Threads x Female Pipe Threads
    • Both ends fit over male pipe threads
    • Lead Free
    • Available in 1/8" - 4" sizes

    Working Pressure, Non Shock (PSI)

    Cold working pressure (CWP): 1/8"- 2" 600 p.s.i. 2-1/2"- 4" 400 p.s.i.

    Saturated steam (WSP): All sizes: 150 p.s.i.

    Conforms to MSS SP-110

    • End connections comply with: ANSI / ASME B1.20.1 (FNPT) ANSI / ASME B16.18 (CTS Sweat)

    • Manufactured in an ISO accredited facility.

    • CSA Certified for use with natural, manufactured, mixed, liquid petroleum and LP gas/air mixtures:

    • ANSI Standard Z21.15 for use as a gas appliance connector valve for 1/2 lb. systems (1/2"-3")

    • CSA Certified 3-88 for use in 2 or 5 lb house piping systems (1/4"& 1/2"-2")

    • ANSI / ASME B16.33 for use in gas piping systems up to 125 psig (1/2"-1")

    • UL listed 44R8 for LP, natural and manufactured gases; flammable liquids, #6 oil at 250°F (1/4"- 2").

    • UL listed 757X for fire protection service (1/2"- 2").

    • Factory mutual approved for fire protection service (1/2"- 2").


SharkBite 1

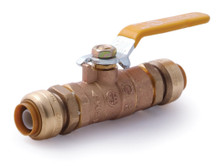
SharkBite 1" Brass Push-Fit Ball Valve (Lead Free)

  • SKU: SBV10
  • Brand:

  • Product Description:

    SharkBite is the Push-Fit connection system that is really taking hold. It’s the easiest way to join copper, CPVC, or PEX pipe in any combination with no soldering, clamps, unions, or glue.

    PREPARATION
    The following instructions must be followed to assemble the SharkBite Connection System.

    Select the correct size fitting and tubing for the job. Check that fittings and tubing are clean, in good condition and are free from damage and foreign objects.

    Cut the tube so that the ends are square. Ensure that there are no burrs or damage to the cut end.

    Wherever possible proper tube cutting tools such as rotary tube cutters (copper tubing) or tube shears (for plastic tubing) should be used.

    Once the tubing end is cut square and clean, use the SharkBite Depth Deburr Gage (sold separately) and a permanent marker to mark the insert depth on the outside of the tubing. This mark is used to ensure that the joint is assembled correctly.

    To assemble correctly, the tubing needs to be pushed into the fitting until it meets the tube stop. Follow these three steps to insert the tubing into the fitting.

    1. Insert the tube through the release collar to rest against the grab ring.

    2. Push the tube firmly with a slight twisting action until it reaches the tube stop.

    3. To ensure that the tube is correctly inserted, check that the depth mark is within 0.005 in (0.13 mm) of the end of the release collar.Just insert the pipe and the stainless steel teeth bite down and grip tight, while a specially formulated O-ring compresses to create a perfect seal.

    Disassembly is just as fast using the simple disconnect tool so fittings and valves can be easily changed and reused.

    They can even be rotated after assembly for easier installation in tight spaces.

    Get SharkBite and get a grip on your next plumbing project.

    Approvals
    ASSE 1061 & NSF/ANSI 372-2010 & NSF/ANSI 61


SharkBite 1/2

SharkBite 1/2" Brass Push-Fit Ball Valve (Lead Free)

  • SKU: SBV05
  • Brand:

  • Product Description:

    SharkBite is the Push-Fit connection system that is really taking hold. It’s the easiest way to join copper, CPVC, or PEX pipe in any combination with no soldering, clamps, unions, or glue.

    PREPARATION
    The following instructions must be followed to assemble the SharkBite Connection System.

    Select the correct size fitting and tubing for the job. Check that fittings and tubing are clean, in good condition and are free from damage and foreign objects.

    Cut the tube so that the ends are square. Ensure that there are no burrs or damage to the cut end.

    Wherever possible proper tube cutting tools such as rotary tube cutters (copper tubing) or tube shears (for plastic tubing) should be used.

    Once the tubing end is cut square and clean, use the SharkBite Depth Deburr Gage (sold separately) and a permanent marker to mark the insert depth on the outside of the tubing. This mark is used to ensure that the joint is assembled correctly.

    To assemble correctly, the tubing needs to be pushed into the fitting until it meets the tube stop. Follow these three steps to insert the tubing into the fitting.

    1. Insert the tube through the release collar to rest against the grab ring.

    2. Push the tube firmly with a slight twisting action until it reaches the tube stop.

    3. To ensure that the tube is correctly inserted, check that the depth mark is within 0.005 in (0.13 mm) of the end of the release collar.Just insert the pipe and the stainless steel teeth bite down and grip tight, while a specially formulated O-ring compresses to create a perfect seal.

    Disassembly is just as fast using the simple disconnect tool so fittings and valves can be easily changed and reused.

    They can even be rotated after assembly for easier installation in tight spaces.

    Get SharkBite and get a grip on your next plumbing project.

    Approvals
    ASSE 1061 & NSF/ANSI 372-2010 & NSF/ANSI 61


SharkBite 3/4

SharkBite 3/4" Brass Push-Fit Ball Valve (Lead Free)

  • SKU: SBV07
  • Brand:

  • Product Description:

    SharkBite is the Push-Fit connection system that is really taking hold. It’s the easiest way to join copper, CPVC, or PEX pipe in any combination with no soldering, clamps, unions, or glue.

    PREPARATION
    The following instructions must be followed to assemble the SharkBite Connection System.

    Select the correct size fitting and tubing for the job. Check that fittings and tubing are clean, in good condition and are free from damage and foreign objects.

    Cut the tube so that the ends are square. Ensure that there are no burrs or damage to the cut end.

    Wherever possible proper tube cutting tools such as rotary tube cutters (copper tubing) or tube shears (for plastic tubing) should be used.

    Once the tubing end is cut square and clean, use the SharkBite Depth Deburr Gage (sold separately) and a permanent marker to mark the insert depth on the outside of the tubing. This mark is used to ensure that the joint is assembled correctly.

    To assemble correctly, the tubing needs to be pushed into the fitting until it meets the tube stop. Follow these three steps to insert the tubing into the fitting.

    1. Insert the tube through the release collar to rest against the grab ring.

    2. Push the tube firmly with a slight twisting action until it reaches the tube stop.

    3. To ensure that the tube is correctly inserted, check that the depth mark is within 0.005 in (0.13 mm) of the end of the release collar.Just insert the pipe and the stainless steel teeth bite down and grip tight, while a specially formulated O-ring compresses to create a perfect seal.

    Disassembly is just as fast using the simple disconnect tool so fittings and valves can be easily changed and reused.

    They can even be rotated after assembly for easier installation in tight spaces.

    Get SharkBite and get a grip on your next plumbing project.

    Approvals
    ASSE 1061 & NSF/ANSI 372-2010 & NSF/ANSI 61